Configuring NEOSYS on Windows 10
Installing NEOSYS on Windows 10
32 bit Windows 10 Pro and Enterprise (NOT 64 bit) will run and serve NEOSYS fine.
32 bit Windows Home is not fully suitable because it does not have IIS web server. NEOSYS processes will run on Windows 10 Home 32 bit but IIS will have to be configured on another computer with access to the NEOSYS folders via a share. The computer running IIS could be any version of Windows including 64 bit.
Get NEOSYS process running
- Open command prompt.
- Right click on window and select 'Properties'.
- Check "Use Legacy Console".

Prevent Windows 10 from entering sleep mode
- Search for 'Power' in the Windows search bar and open 'Power & Sleep settings'
- From the dropdown select 'Never' for both Screen and Sleep times. (If setting unavailable go to step 3)
- Double check the machine doesn't have sleep mode capabilities. Run "powercfg /a" in command prompt.

Installing Telnet using Windows Features & enable NTVDM
- Search for 'Windows features' in the Windows search bar and open 'Turn Windows features on or off'
- Check Telnet Client if not selected already
- Also navigate to Legacy Components and tick NTVDM.
- Click OK

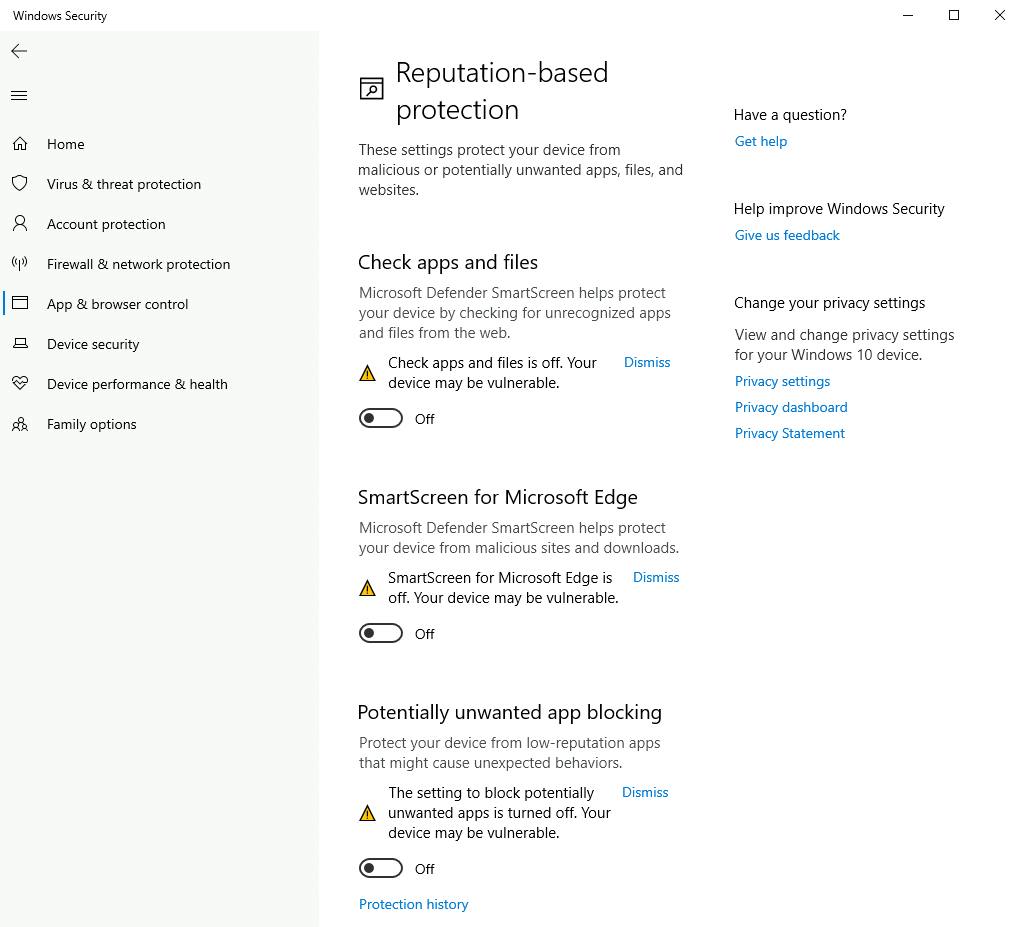
Turning off Windows Smartscreen Protection
Even if Windows Defender is switched off, Windows Smartscreen will also block various NEOSYS files just for fun so it must be switched off as follows.
- Use windows search bar to search for "Smartscreen" and navigate to Reputation-based protection.
- Disable all the sections on this page
Make sure to log out of administrator and login again afterwards for the new settings to actually take effect.

Excluding ntvdm.exe from Windows Defender
Must be done otherwise performance according to FILESPEED is 10 to 20 times slower.
- Use windows search bar to navigate to 'Virus & threat protection', 'Virus & threat protection settings'.
- Scroll down to subheading 'Exclusions' and click on 'Add or remove exclusions'.
- Click + button and add process "ntvdm.exe", the Drive NEOSYS is installed on and the ".lv" and ".lk" file formats.
Note that only excluding ntvdm.exe restores the file speed issue.

Running AREV.EXE in compatibility mode
- Right click AREV.EXE in \neosys\ folder
- Properties
- Compatibility tab
- Run with compatibility for Win95
Configuring Windows Automatic Update
- Use windows search bar to navigate to 'Local Group Policy Editor'.
- Expand 'Computer Configuration' > 'Administrative Templates' > 'Windows Components' > 'Windows Update'.
- Double click on 'Configure Automatic Updates'.
- Check 'Enabled'.
- In drop down menu choose the "4 - Auto download and schedule the install" option.
- Then choose the required Scheduled install day e.g. "1 - Every Sunday".
- Time by default is set to 3:00.
- Click apply and then OK.
- Double click on "Always automatically restart at the scheduled time".
- Check 'Enabled'.
- Click apply and then OK.


Enabling Task Scheduler History
Windows 10 has Task Scheduler history disabled by default, making it difficult to investigate scheduled task failures.
To enable task history, on the Task Scheduler window click "Enable All Tasks History" under "Actions" as shown below.
