Configuring IIS
After you have installed all the NEOSYS program files you need to configure IIS so that you can operate NEOSYS. Instructions are below.
Configuring IIS for Windows 2008
Installing IIS
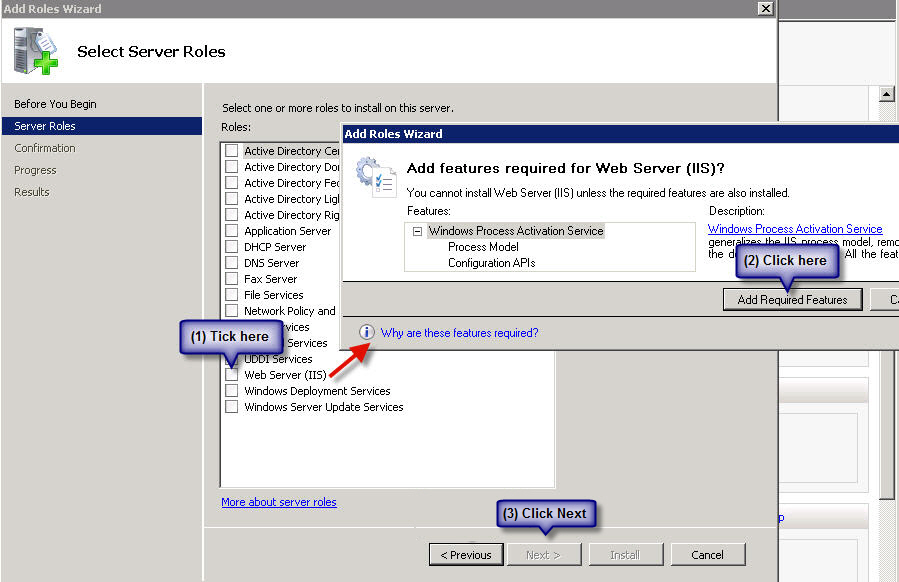
First install IIS from Control Panel > Programs & Features > Turn Windows Features ON or OFF > Add Roles:

On the window that pops up click on next and you will get this screen, tick Web Server (IIS) - on the prompt click on Add Required Resources and then on Next:
On the next window, click on next until you get this window - tick ASP and ISAPI Extensions:
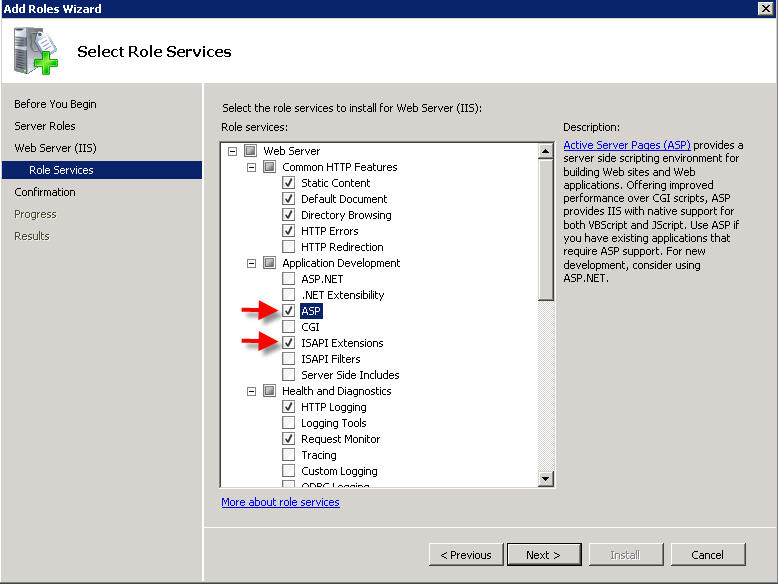
Click on Next and Finish
Configuring IIS
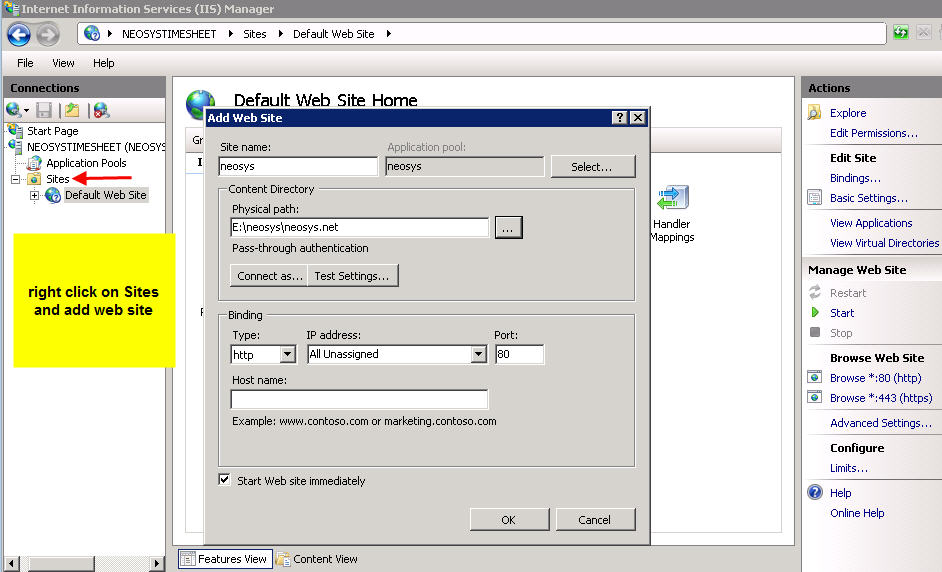
After successfully installing IIS, go to Control Panel > Administrative Tools > Computer Management > Services and Applications > Internet Information Services (IIS) > Default Website:
The first step is to create a virtual directory called neosys linked to D:\neosys\neosys.net:
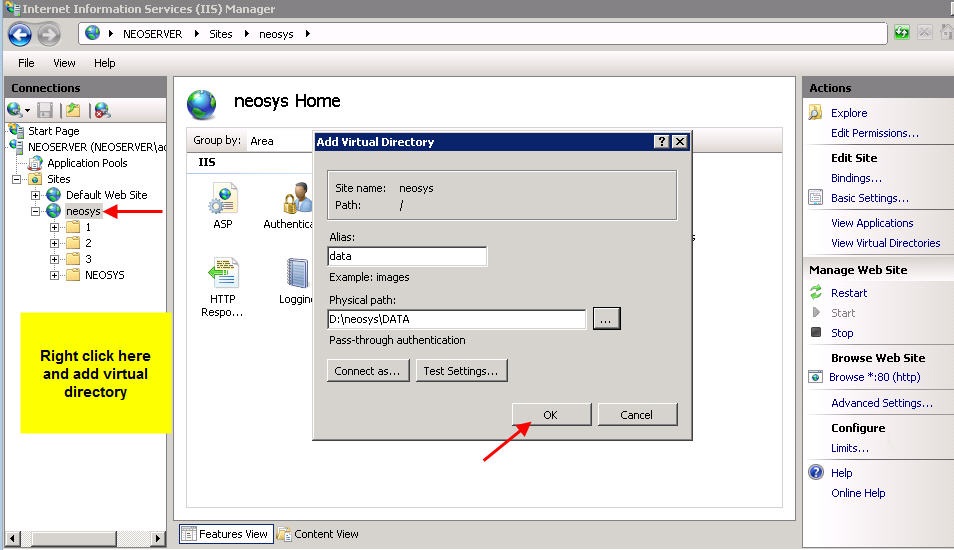
Within the above neosys web site folder create a virtual directory called data linked to D:\neosys\data:
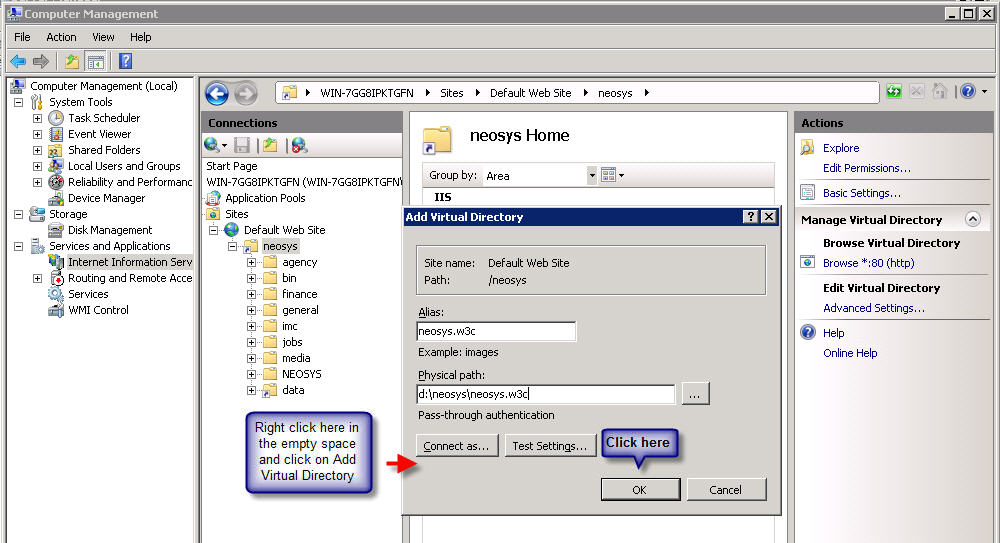
In the IIS Default Web Site create a another virtual directory called neosys.w3c linked to D:\neosys\neosys.w3c (only if timesheets for mac is required):
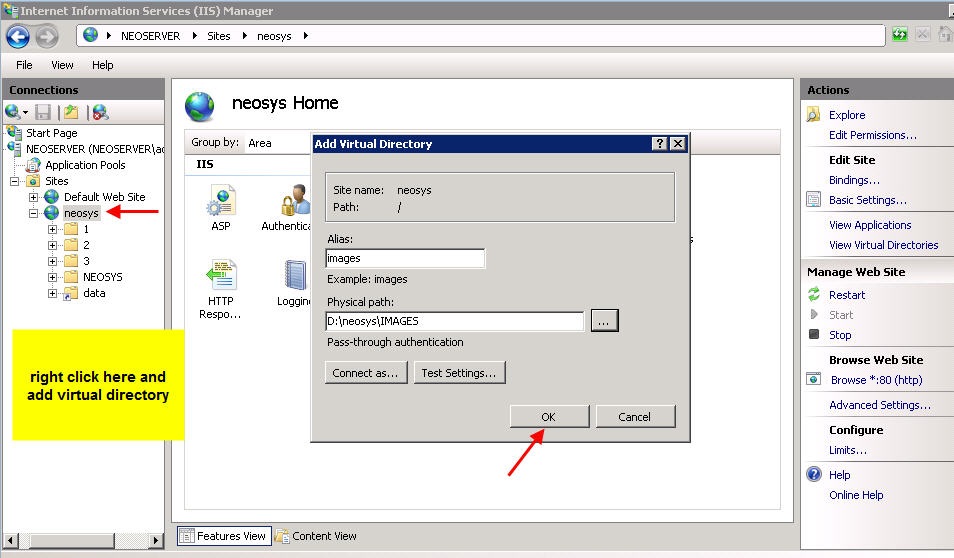
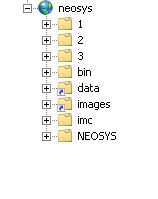
To allow file uploads – create a folder IMAGES under D:\neosys and within the neosys web site folder create a virtual directory called images linked to D:\neosys\images:
Under IIS, Default Website, neosys – click on Bindings, Add Script Map – Request path: *.dll , Executable: D:\neosys\neosys.net\NEOSYS\dll\upload.dll , Name: ISAPI
Edit the hosts file under c:\windows\system32\drivers\etc\ to delete the # sign next to 127.0.0.1 localhost File:Iis9.jpg