Configuring Thunderbird
Setting Up the Inbox Accounts
The instructions given below explain how to set up the "Support" account on Thunderbird.
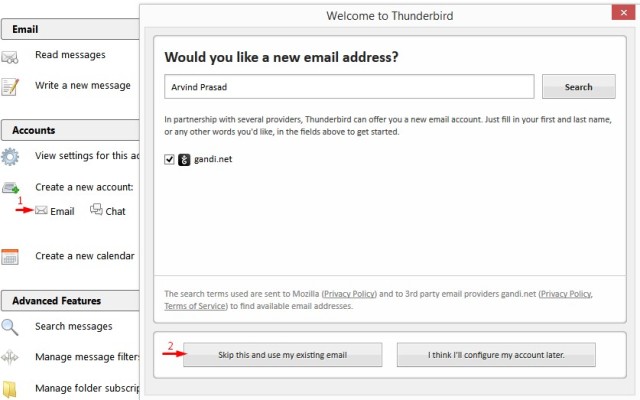
1. Open Mozilla Thunderbird. Choose the "Create a new account" option. Click on "Skip this and use my existing email" option on the "Welcome to Thunderbird" window.
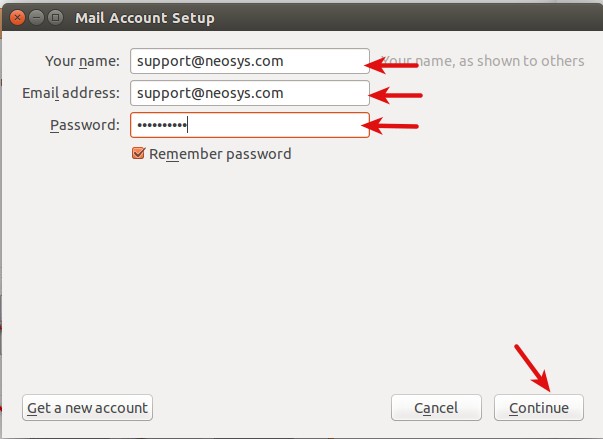
2. In the Mail Account Setup window, enter "support@neosys.com" for Your Name, "support@neosys.com" for Email Address and the password provided by Neosys staff. Click on continue.
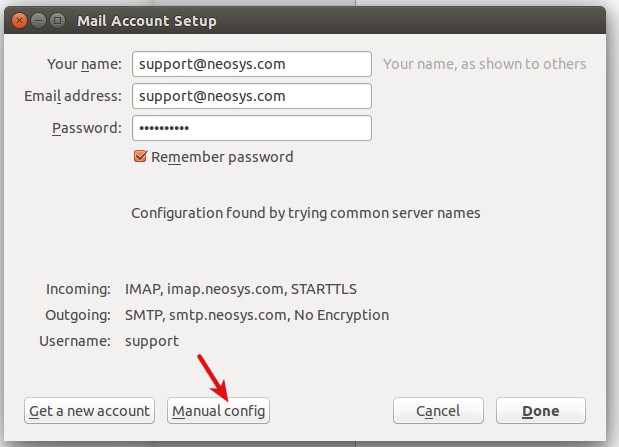
3. Click on "Manual Config".
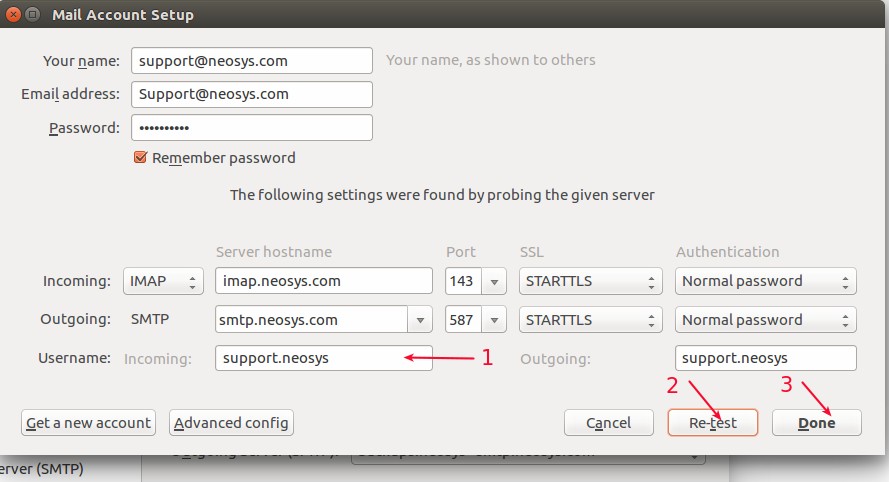
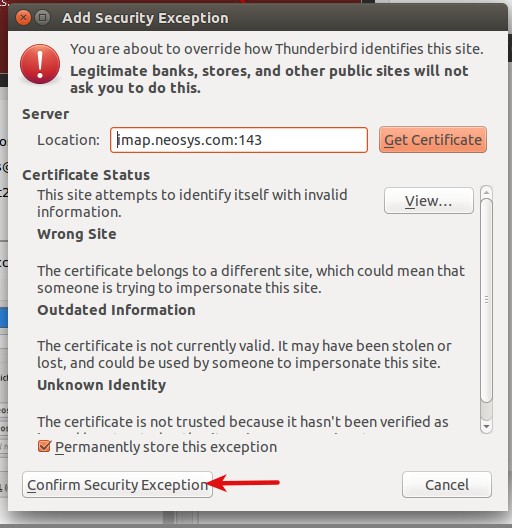
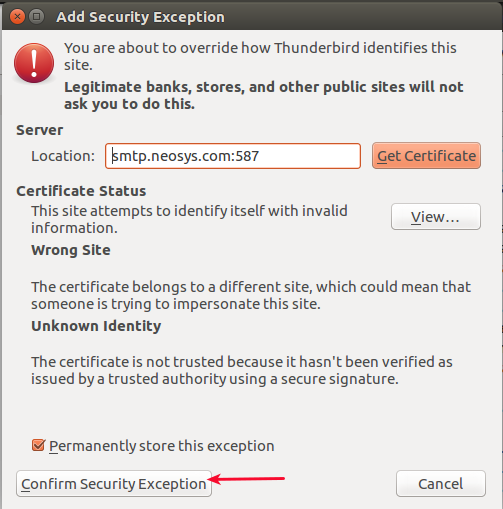
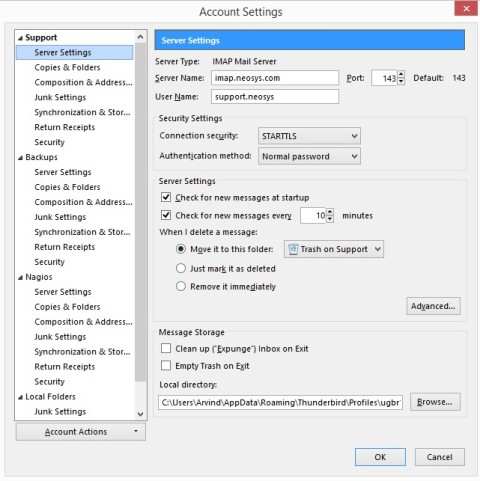
4. Key in "imap.neosys.com" for incoming IMAP host name, server hostname "smtp.neosys.com" and port "587" for outgoing SMTP and "support.neosys" as username. For SMTP, change the SSL to "STARTTLS" and authentication to "No authentication". Click on the "Re-test" button and then click "Done".
You MUST allow the inbox of each account to sync with existing mails before adding other inboxes. This is because if you add all the accounts together at once, they will all sync together and it will take 1-2 days for the sync to complete.
For backups@neosys.com, support2@neosys.com (Nagios), name.neosys@gmail.com repeat the steps mentioned above, with the below mentioned replacements.
1. For backups@neosys.com, enter "backups@neosys.com" for Your Name, "backups@neosys.com" for Email address and enter the password provided by Neosys staff. Enter the username as "backups.neosys".
2. For support2@neosys.com, enter "support2@neosys.com" for Your Name, "support2@neosys.com" for Email address and enter the password provided by Neosys staff. Enter the username as "support2.neosys".
3. For name.neosys@gmail.com, enter your full name for Your Name, "name.neosys@gmail.com" for Email address and enter password. You do not need to follow the steps for manual config as the settings will be automatically configured.
Account Settings
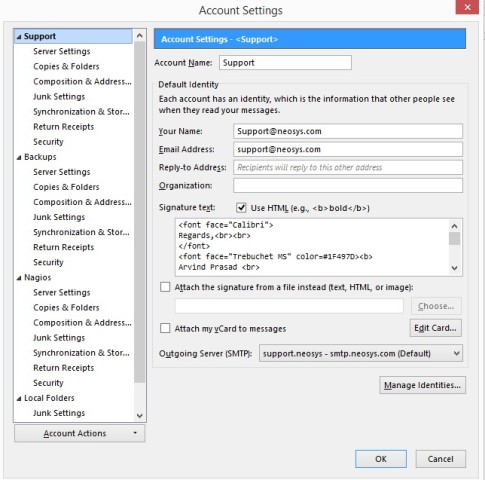
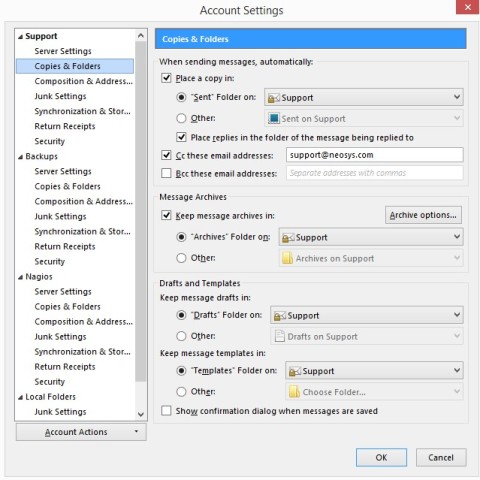
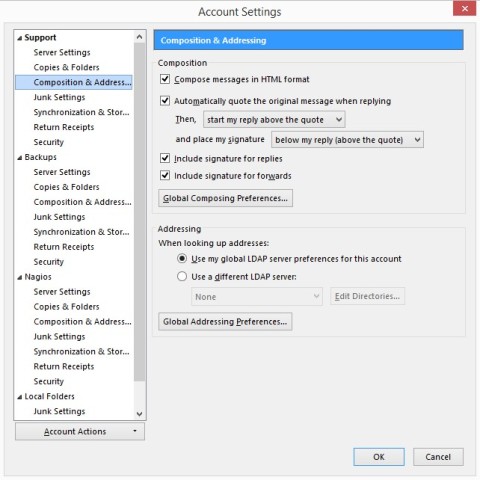
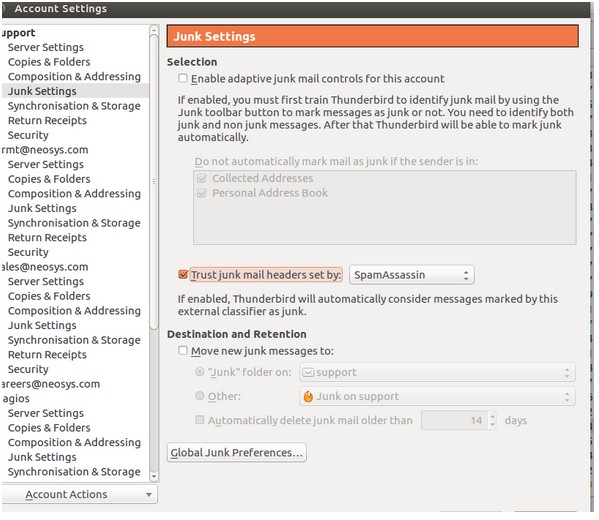
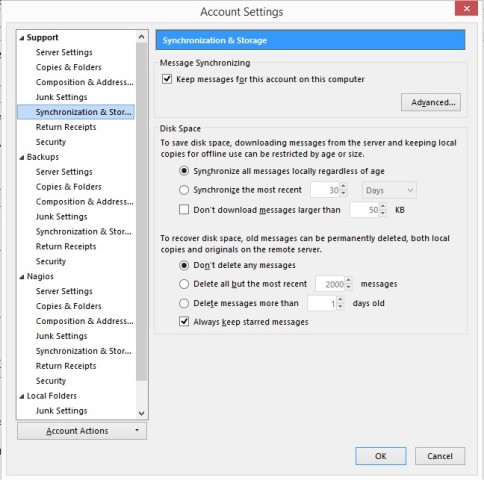
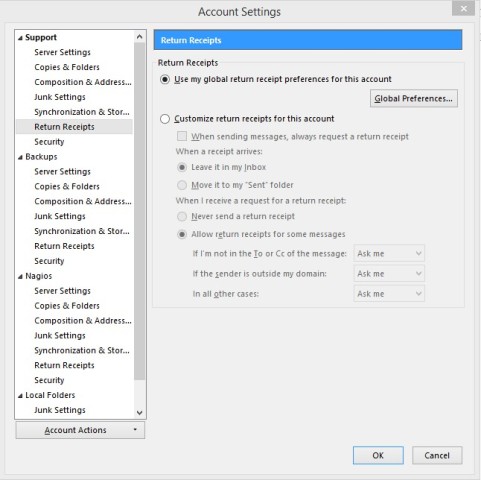
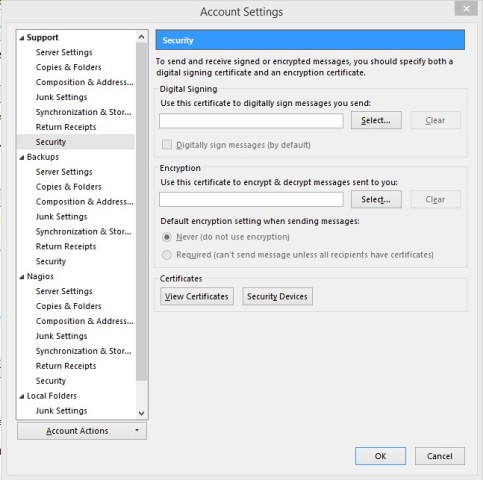
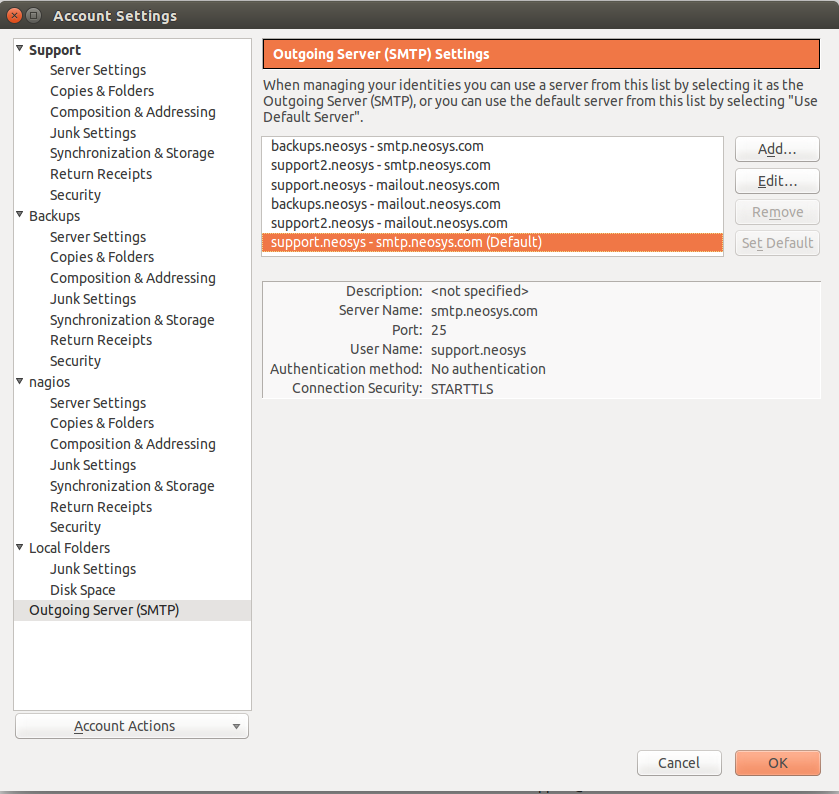
Verify that the account settings for all the accounts are entered as shown below.
The default outgoing mail server should have "smtp.neosys.com" as "Default" and an alternative way via mailout.neosys.com, port :2500 MUST be added so that in case the main mail server goes down we can at least send emails.
You can add a new mail server using the Add button. Enter mailout server name/port, enter the account username and keep the "Security and Authentication" settings same as smtp.
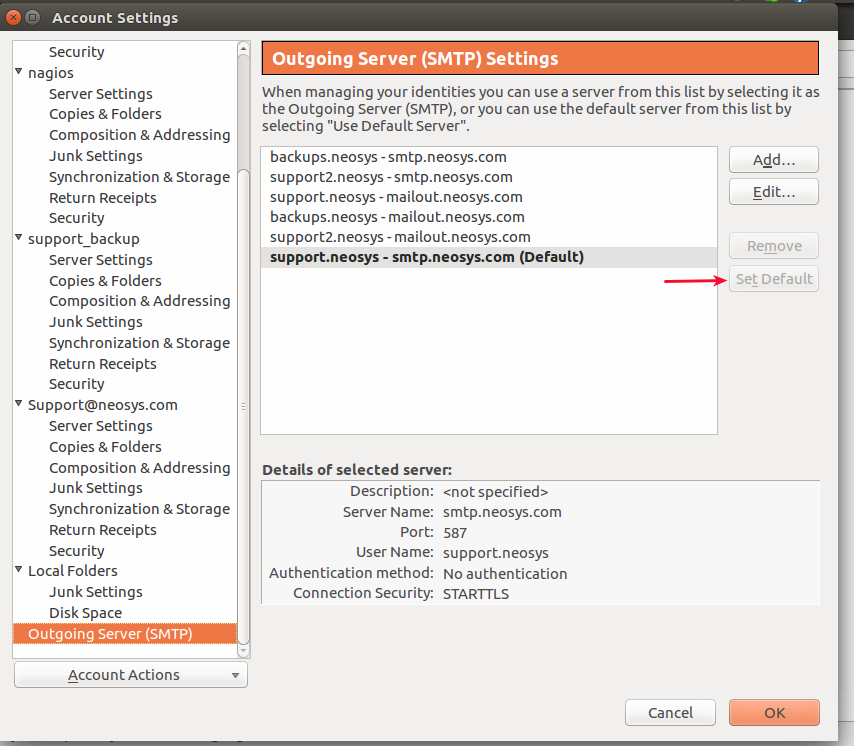
Switching between the outgoing mail server settings
See the screenshot below to switch to a different outgoing mail server in Thunderbird. Set the server as default which you want to use as your outgoing mailout server.
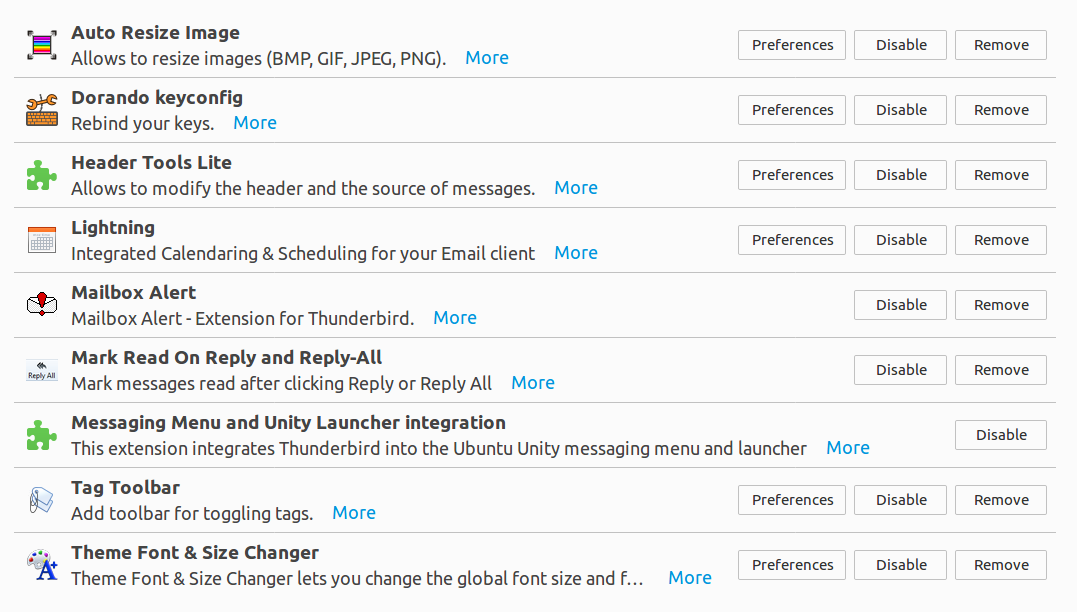
Add-ons
Other configurations
Configure Support inbox to display the "Date Received" for all emails
You MUST add DATE RECEIVED column to email inbox because the default Date seems to be the DATE SENT whereas we are primarily interested in the date we received the email. The difference is due to delays in email servers or spam tricks.
Configure Mail Content
Preferences > Privacy > untick "Allow remote content in messages"
Support MUST set the "Allow remote content in messages" as blocked in Thunderbird without adding any exceptions for any email id. The reason is remote content i.e embedded images, stylesheets etc is a privacy concern as it sends your private information to the mail sender. We do not know the source of these embedded content in emails so cannot trust them as they can be web bugs.
Configure Layout View
Layout view should be set as Vertical view.
Thunderbird Preferences
Preferences > Display > Advanced > untick " Automatically mark messages as read"
Remove Junk status column
Remove the Junk Status column from your Thunderbird.
Right click on a column heading > Untick Size
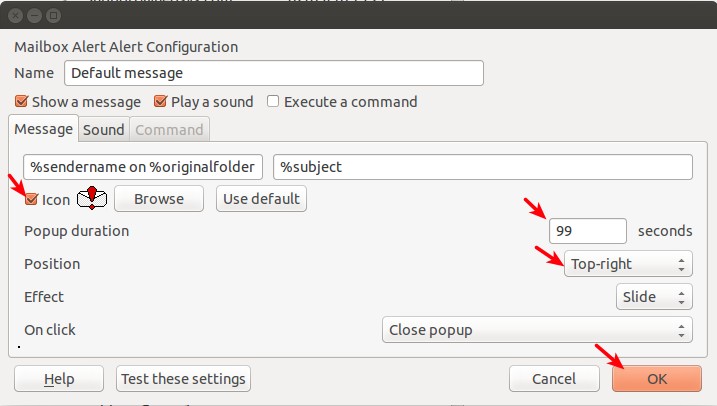
Configure MailAlert
Right click Inbox > Mailbox Alert > Edit Mailbox Alert alerts > Select Default message. Set as below. Once set Right click Inbox > Mailbox Alert > check Default message
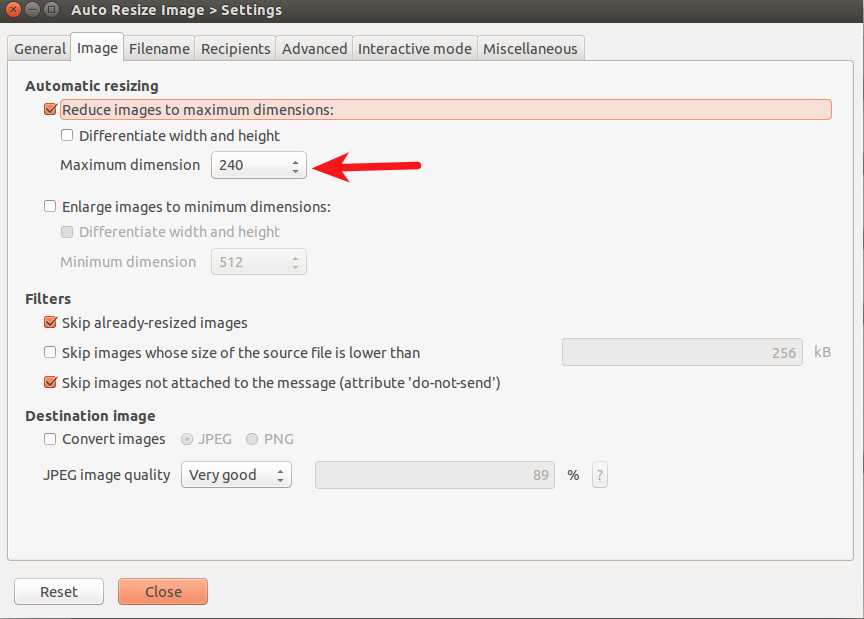
Configure Auto Resize Image
Set the preferences for the Auto Resize Image add on as shown in the screenshot at the end of this section.
To handle different scenarios when resizing images in emails, follow the below steps:
- Resize all images in the email: Click "Send" followed by "Confirm" on the Auto resize screen.
- Skip resize all images in the email: Click "Send" followed by "Cancel Resizing" on the Auto resize screen.
- Resize Images only in the email trail and skip resizing new images: Click "Resize" on top of your screen and proceed with writing the email/adding new images. When ready to send the email, follow above step for skipping resize all images in the email.
