Sonicwall Firewall Configuration: Difference between revisions
mNo edit summary |
No edit summary |
||
| Line 1: | Line 1: | ||
=== Login information === | === Login information === | ||
#Sonicwall IP Address : http://192.168.1.1 | |||
#Model No. : TX-180 | |||
#Username : admin | |||
#Password : xxxx | |||
Known clients using it: | Known clients using it: | ||
| Line 5: | Line 10: | ||
# Bahrain Media Services (Adlinem) | # Bahrain Media Services (Adlinem) | ||
=== Creating Port Forwarding Rules === | === Creating Port Forwarding Rules === | ||
Revision as of 03:30, 9 November 2009
Login information
- Sonicwall IP Address : http://192.168.1.1
- Model No. : TX-180
- Username : admin
- Password : xxxx
Known clients using it:
- Altovista
- Bahrain Media Services (Adlinem)
Creating Port Forwarding Rules
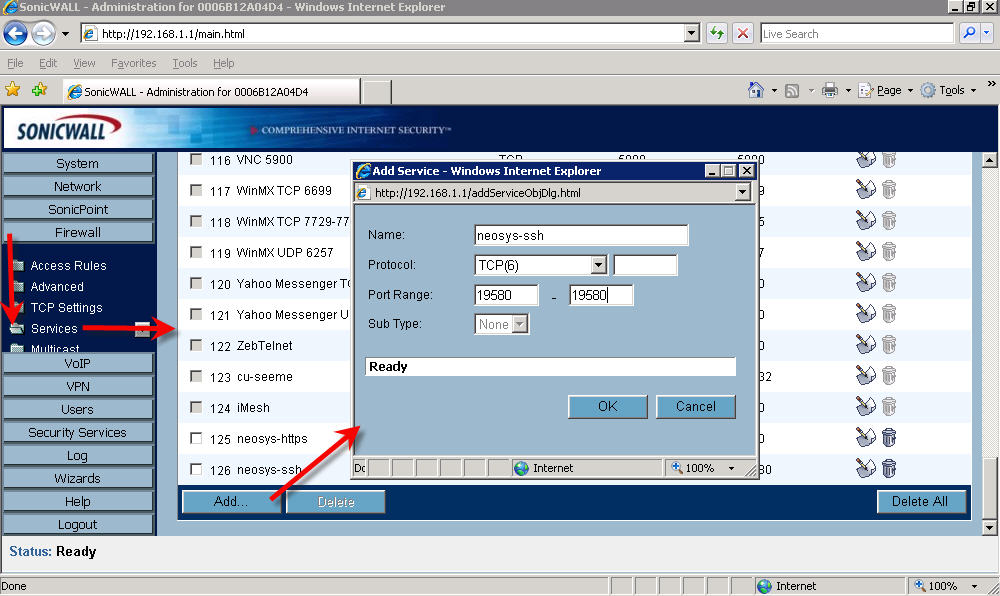
Creating Services
The first step of creating a port forwarding rule in Sonicwall is to create a service (under Firewall > Services > Add)
Create Access Rules
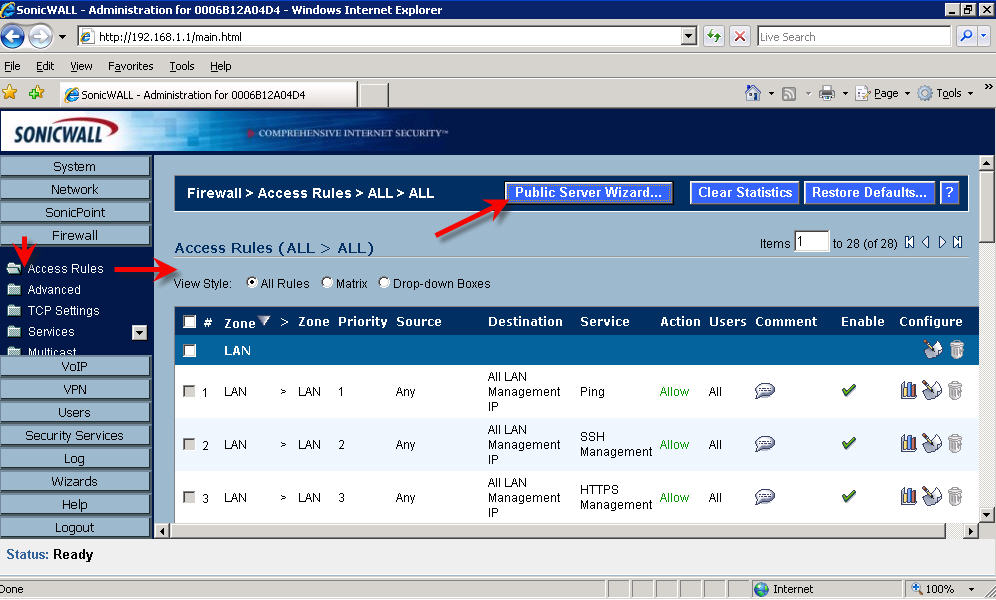
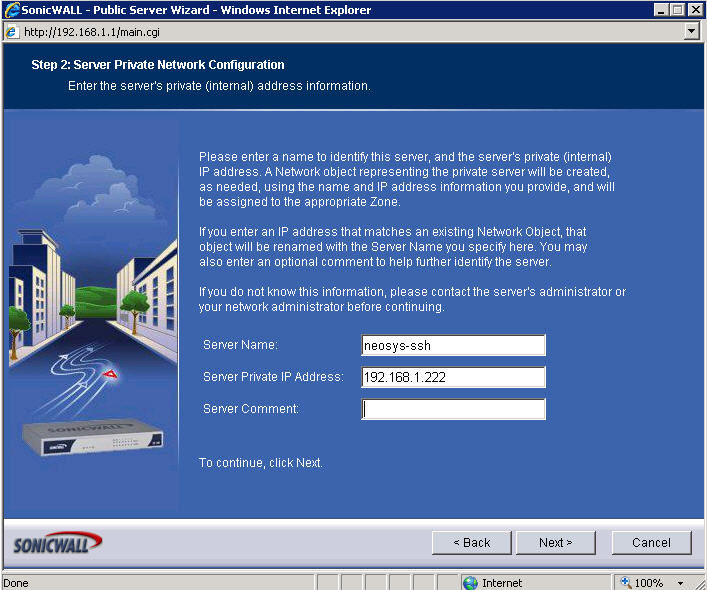
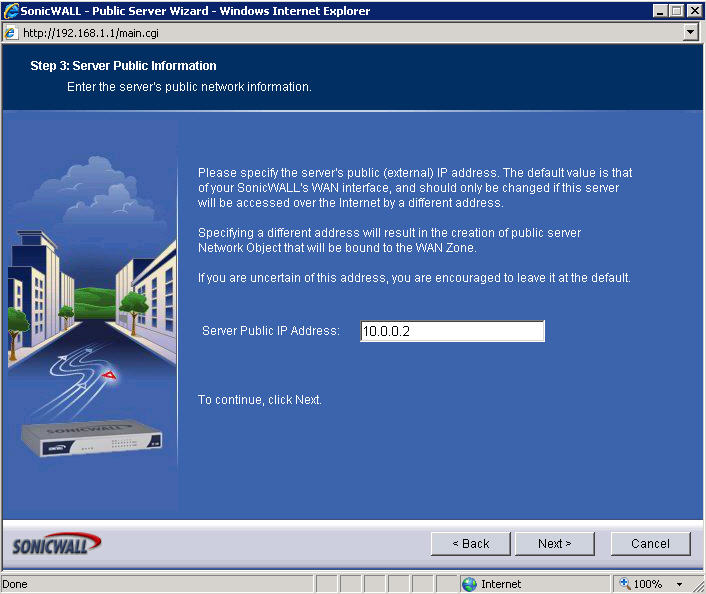
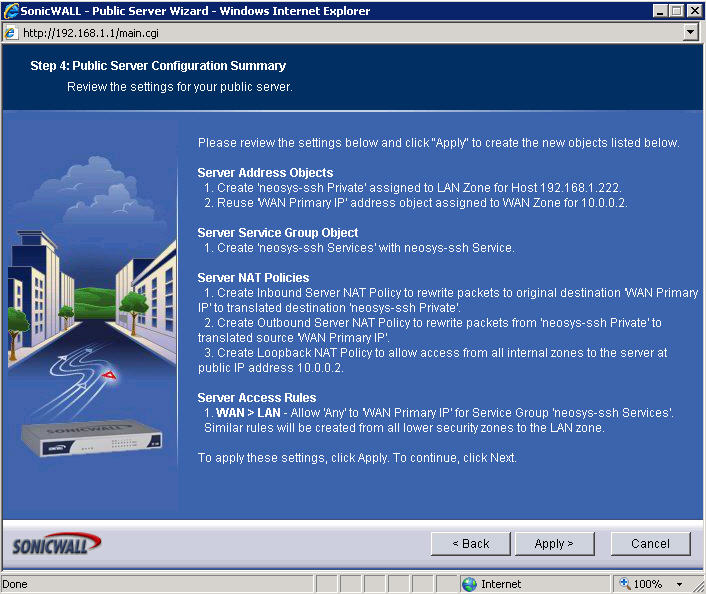
After you have created the service, you need to create an access rule to allow permission from WAN to LAN. This has be from from Access Rules (under Firewall > Access Rules > Public Server Wizard). Follow the screenshots:
Click on Public Server Wizard
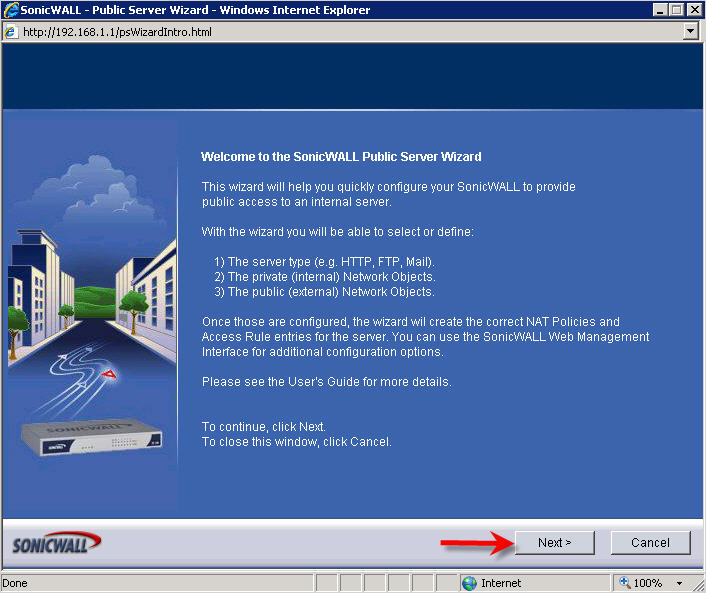
Click on Next on the popup
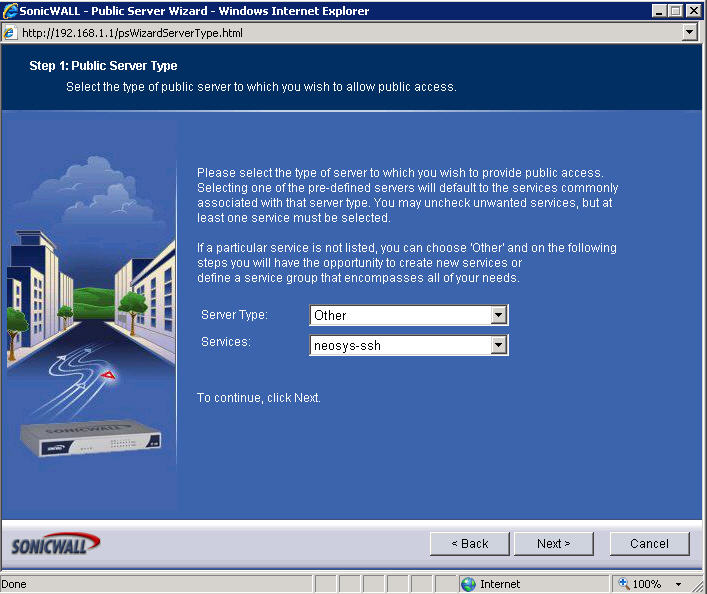
Select Other as the Server Type and the service you want to allow access from WAN to LAN, click on Next
Type in the name of the server (can be anything for reference), and the IP address of the NEOSYS server to which you need to forward the port to, and click on Next
The firewall public IP address appears here and click on Next (do not edit)
Click on Apply
Repeat the steps to add another port
