Configuring IIS: Difference between revisions
No edit summary |
|||
| Line 2: | Line 2: | ||
== Configuring IIS for windows 2003 == | == Configuring IIS for windows 2003 == | ||
=== Creating a virtual web directory === | |||
'''Client Server:''' first step is to create a virtual directory called neosys linked to D:\neosys\neosys.net: | '''Client Server:''' first step is to create a virtual directory called neosys linked to D:\neosys\neosys.net: | ||
| Line 10: | Line 12: | ||
[[image:figure3.jpg]] | [[image:figure3.jpg]] | ||
A new window will pop up "IP Address and Port Setting" after completion of the above step. | A new window will pop up "IP Address and Port Setting" after completion of the above step. | ||
| Line 39: | Line 39: | ||
==== Permit upload.dll ==== | ==== Permit upload.dll ==== | ||
# Right click Default Web Site, neosys, | # Right click Default Web Site, neosys, NEOSYS, dll | ||
# Execute Permissions: Scripts and Executables | # Execute Permissions: Scripts and Executables | ||
Revision as of 17:01, 2 May 2012
After you have installed all the NEOSYS program files you need to configure IIS so that you can operate NEOSYS. Instructions are below.
Configuring IIS for windows 2003
Creating a virtual web directory
Client Server: first step is to create a virtual directory called neosys linked to D:\neosys\neosys.net:
NL1 Server: Create a website called "clientname" linked to D:\hosts\clientfolder\neosys.net
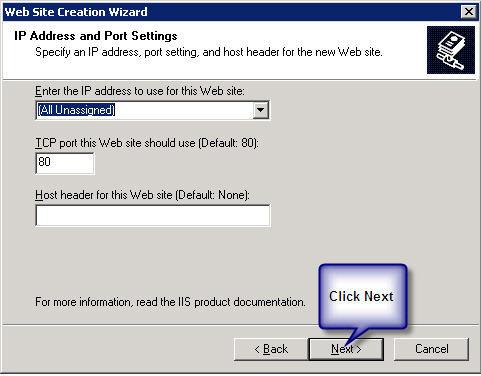
A new window will pop up "IP Address and Port Setting" after completion of the above step.
Client Server: select *(All Unassigned)* from the drop down list of "Enter the IP address to use for the Web site" and keep the default port as 80.
NL1 Server: Select the static Ip from the drop down list of "Enter the IP address to use for the Web site" and enter then next port available and click on next.
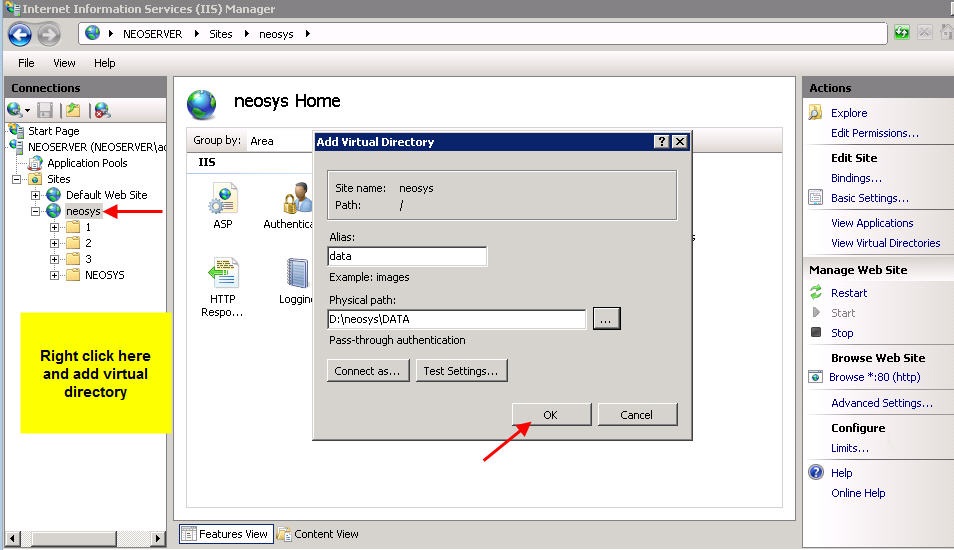
Client Server: Within the above neosys web site folder create a virtual directory called data linked to D:\neosys\data:
Nl1 Server: Within the above clientwebsite folder create a virtual directory called data linked to D:\hosts\clientfolder\data:
(I haven’t got the screenshot because I can only get it once I create the above)
To allow file uploads
Create IMAGES directory
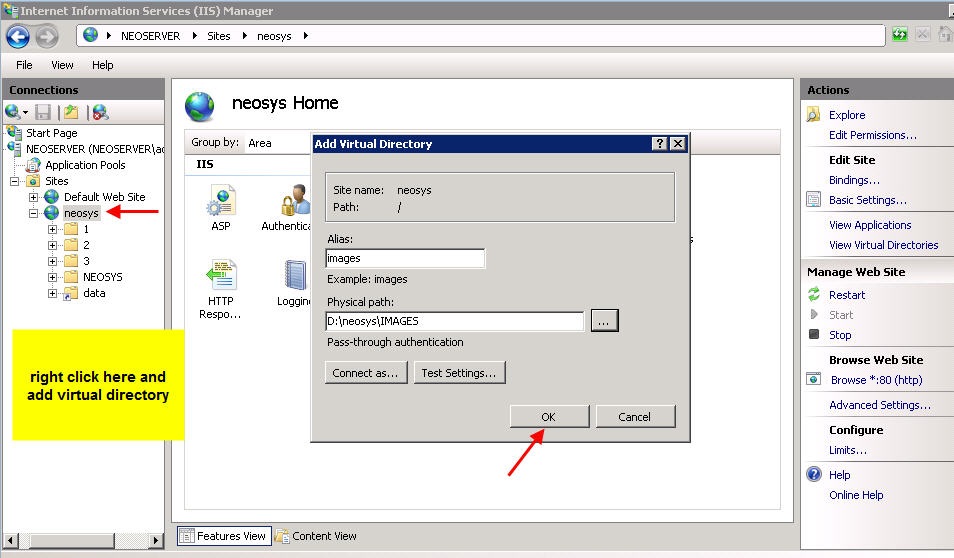
Client server: create a folder IMAGES under D:\neosys and within the neosys web site folder create a virtual directory called images linked to D:\neosys\images: Modes: READ and WRITE
Nl1 Server: create a folder IMAGES under D:\hosts\clientfolder and within the client web site folder create a virtual directory called images linked to D:\hosts\clientfolder\images: Modes: READ and WRITE
(I haven’t got the screenshot because I can only get it once I create the above)
Permit upload.dll
- Right click Default Web Site, neosys, NEOSYS, dll
- Execute Permissions: Scripts and Executables
- Internet Information Services (IIS) Manager
- Web Service Extensions
- All Unknown ISAPI Extensions: Allowed
Solving error during file upload: "Page cannot be displayed" HTTP Error 405
This error should not occur in normal NEOSYS installations but the solution is as follows:
- Go to Control Panel, Administrative Tools, Internet Information Services
- Expand the tree to COMPUTERNAME, Web Sites
- Right-click "Default Web Site" (or specific Web Site if multiple NEOSYS http/https installations on the server as per NL1)
- Properties
- Home Directory
- Configuration
- Mappings, Add
- Browse
- Dynamic Link Libraries *.dll" from the "Files of Type" dropdown
- Find and select D:\NEOSYS\neosys.net\NEOSYS\dll\upload.dll (OR upload.dll in the installation directory)
- Extension Type: dll
- Limit to: All
- Click the "OK" button
Configuring IIS for Windows 2008
Installing IIS
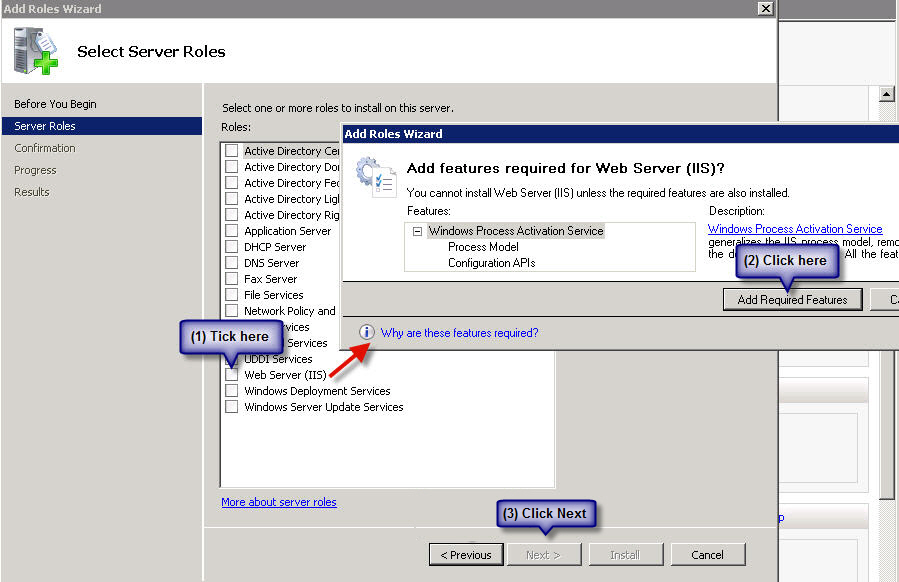
First install IIS from Control Panel > Programs & Features > Turn Windows Features ON or OFF > Add Roles:
On the window that pops up click on next and you will get this screen, tick Web Server (IIS) - on the prompt click on Add Required Resources and then on Next:
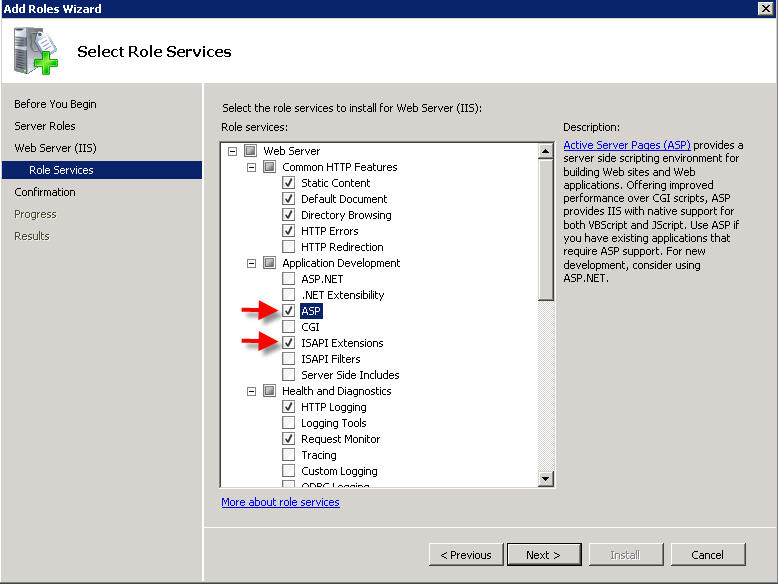
On the next window, click on next until you get this window - tick ASP and ISAPI Extensions:
Click on Next and Finish
Configuring IIS
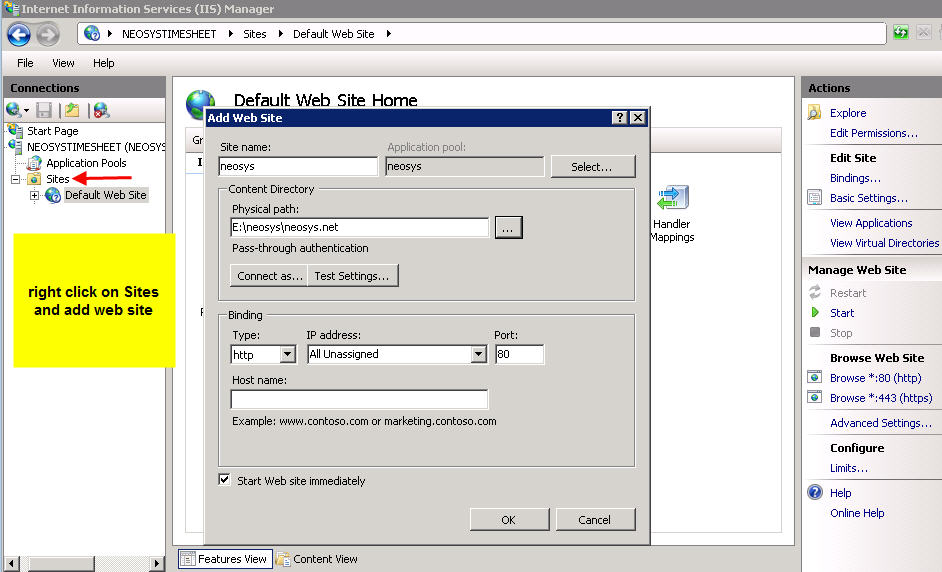
After successfully installing IIS, go to Control Panel > Administrative Tools > Computer Management > Services and Applications > Internet Information Services (IIS) > Machine Name > Sites > Default Website:
The first step is to create a virtual directory called neosys linked to D:\neosys\neosys.net:
Within the above neosys web site folder create a virtual directory called data linked to D:\neosys\data:
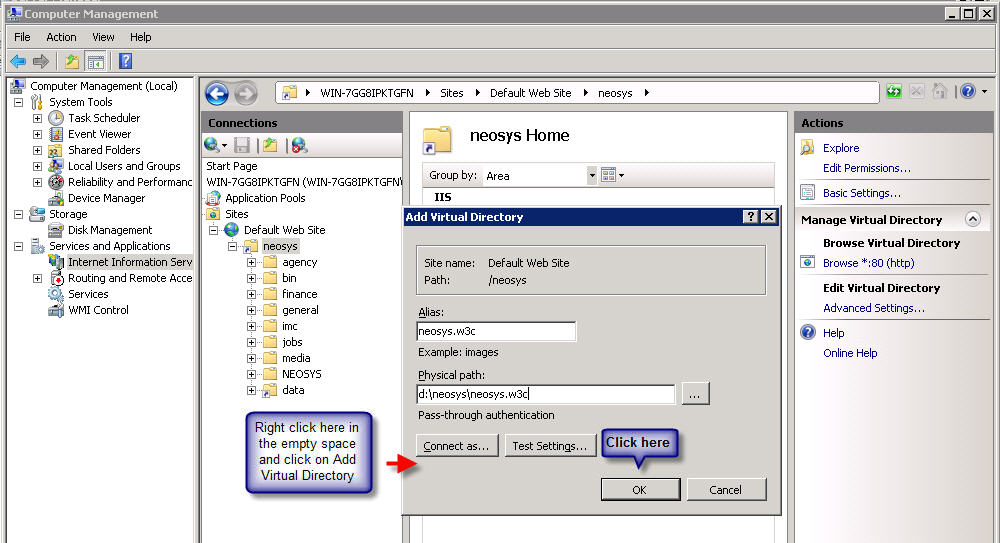
In the IIS Default Web Site create a another virtual directory called neosys.w3c linked to D:\neosys\neosys.w3c (only if timesheets for mac is required):
To allow file uploads – create a folder IMAGES under D:\neosys and within the neosys web site folder create a virtual directory called images linked to D:\neosys\images:
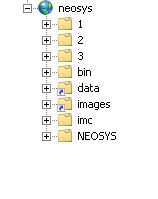
After you add all virtual directories the tree map of the Default Website should look as follows:
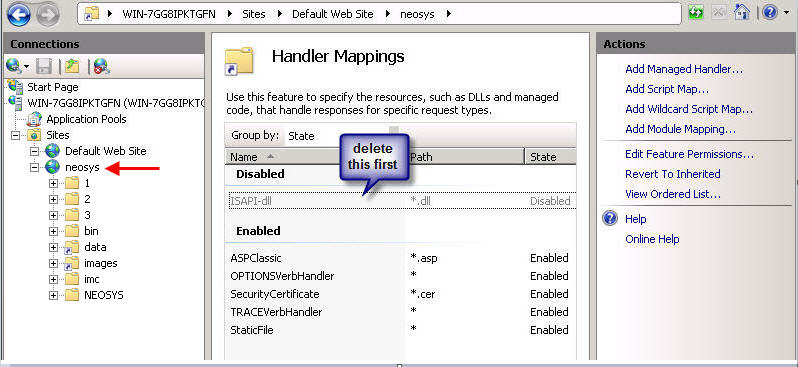
To configure file uploads besides adding the images directory, go under IIS > Default Website > neosys – click on Handler Mappings and delete the ISAPI you see there:
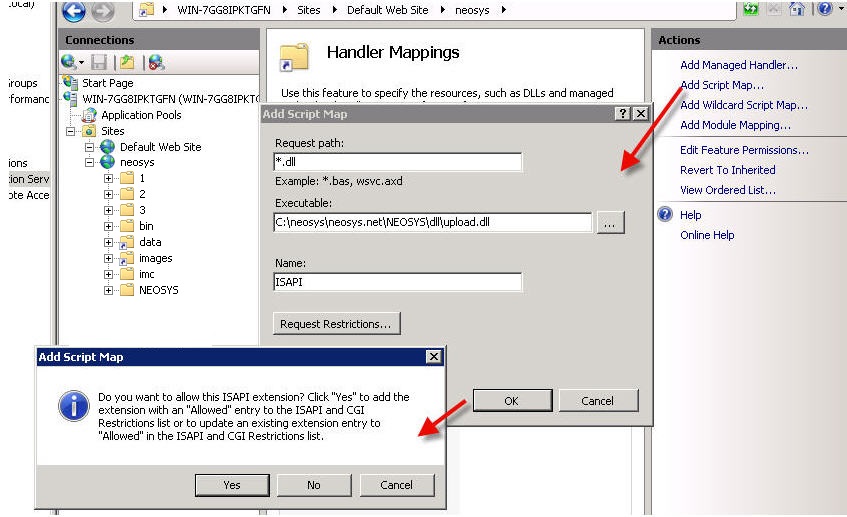
Thereafter click on Add Script Map and fill in the details as follows – Request path: *.dll , Executable: D:\neosys\neosys.net\NEOSYS\dll\upload.dll , Name: ISAPI (once you click on OK click on YES to the confirmation box)
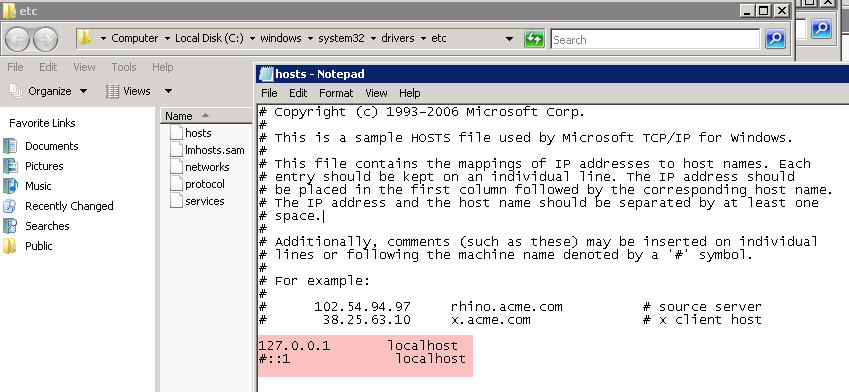
Edit the hosts file under c:\windows\system32\drivers\etc\ - delete the # sign next to 127.0.0.1 localhost and incluide the # sign before ::1 localhost


