Configuring Thunderbird: Difference between revisions
| Line 62: | Line 62: | ||
[[File:acsettings9.jpg]] | [[File:acsettings9.jpg]] | ||
=== Changing the outgoing server settings === | |||
See the screenshot below to change the outgoing mail server in Thunderbird. | |||
[[File:Mailout.png]] | |||
== Add-ons == | == Add-ons == | ||
Revision as of 06:09, 22 February 2016
Setting Up the Inbox Accounts
The instructions given below explain how to set up the "Support" account on Thunderbird.
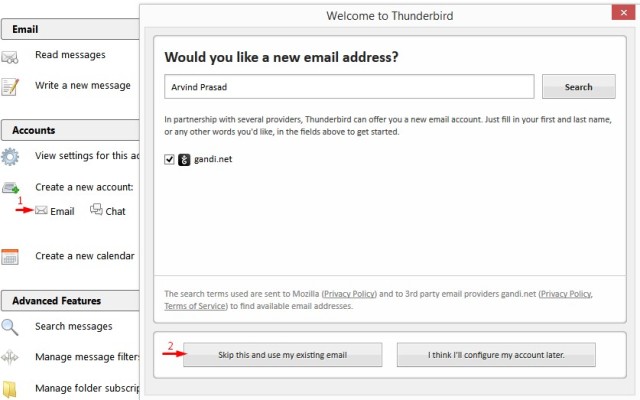
1. Open Mozilla Thunderbird. Choose the "Create a new account" option. Click on "Skip this and use my existing email" option on the "Welcome to Thunderbird" window.
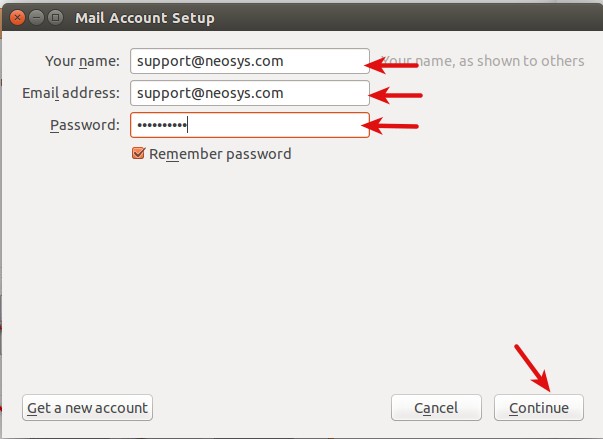
2. In the Mail Account Setup window, enter "support@neosys.com" for Your Name, "support@neosys.com" for Email Address and the password provided by Neosys staff. Click on continue.
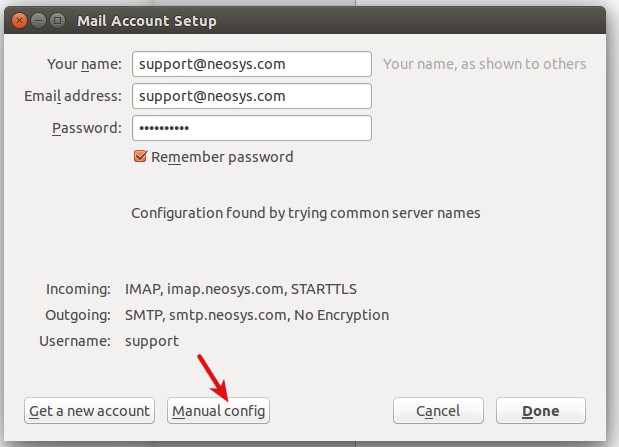
3. Click on "Manual Config".
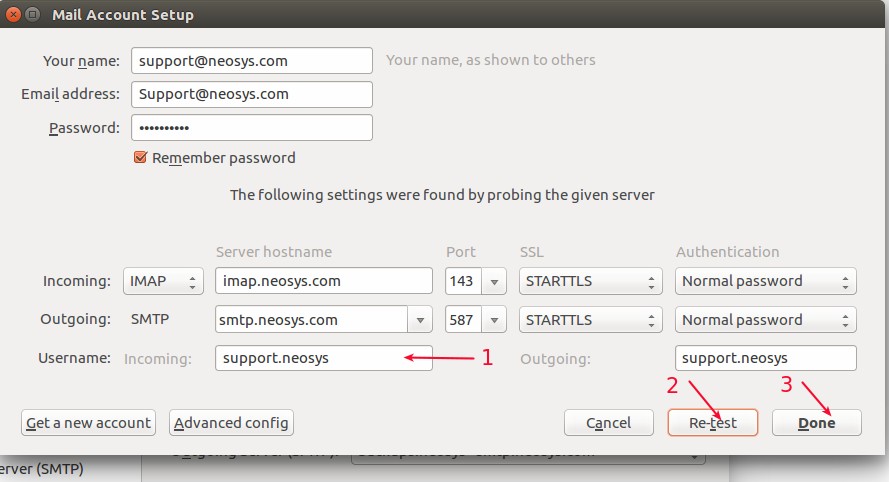
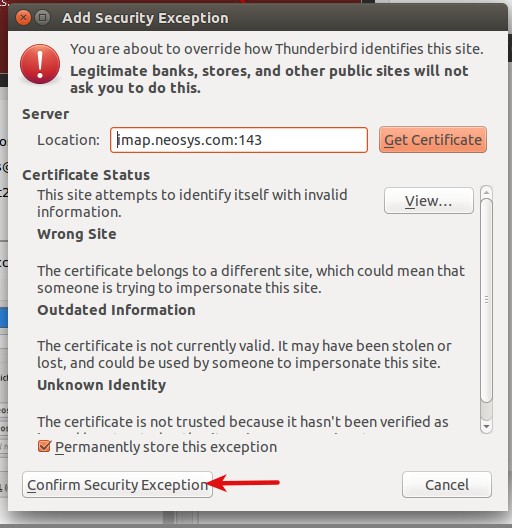
4. Key in "imap.neosys.com" for incoming IMAP host name, server hostname "smtp.neosys.com" and port "25" for outgoing SMTP and "support.neosys" as username. For SMTP, change the SSL to "STARTTLS" and authentication to "No authentication". Click on the "Re-test" button and then click "Done".
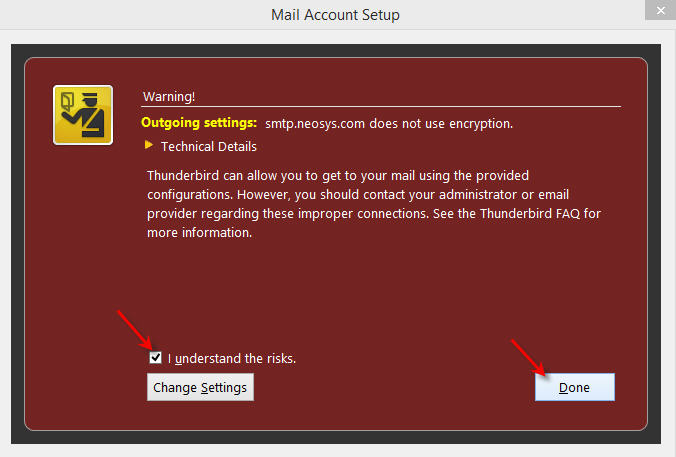
5. A warning message will show up stating that no encryption has been used for outgoing settings. Check "I understand the risks" and click "Done".
For backups@neosys.com and support2@neosys.com (Nagios), repeat the steps mentioned above, with the below mentioned replacements.
1. For backups@neosys.com, enter "backups@neosys.com" for Your Name, "backups@neosys.com" for Email address and enter the password provided by Neosys staff. Enter the username as "backups.neosys".
2. For support2@neosys.com, enter "support2@neosys.com" for Your Name, "support2@neosys.com" for Email address and enter the password provided by Neosys staff. Enter the username as "support2.neosys".
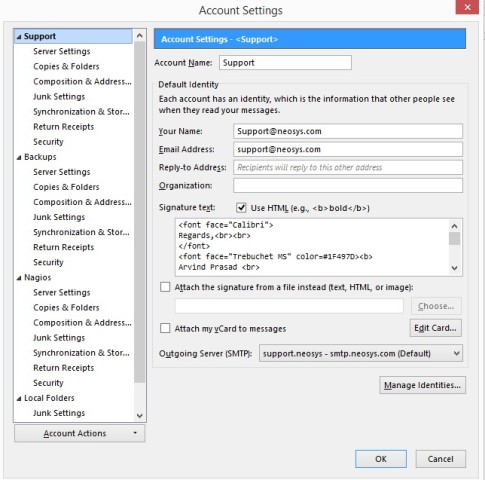
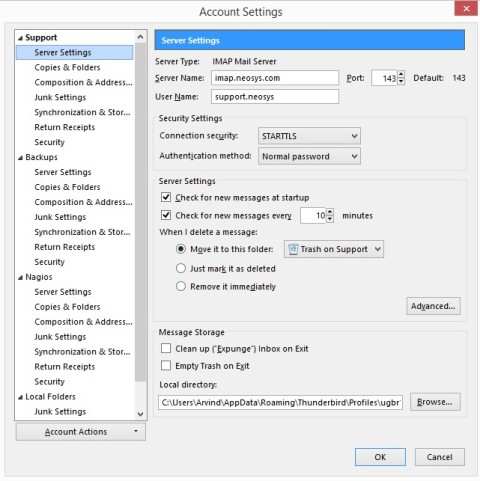
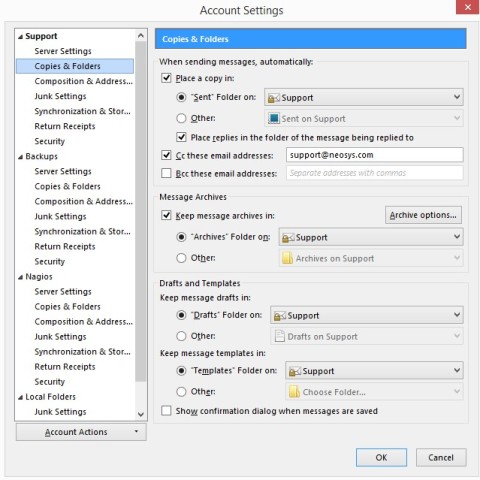
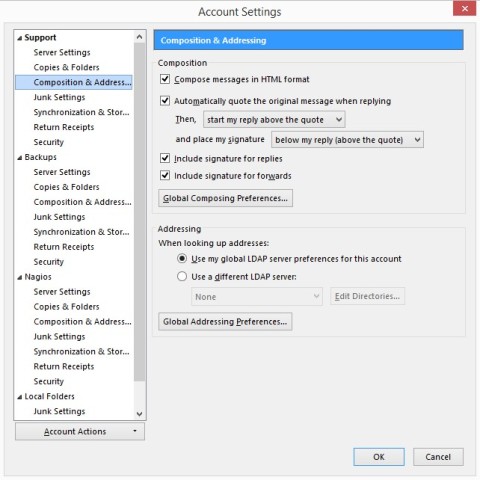
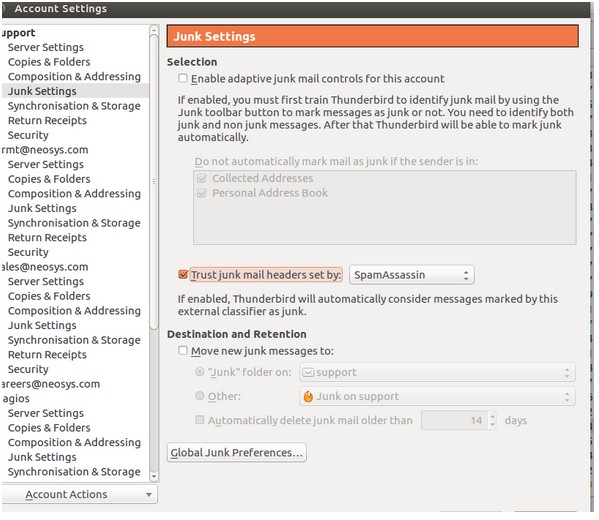
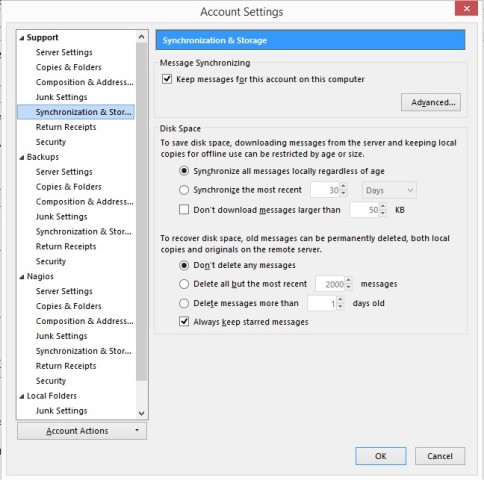
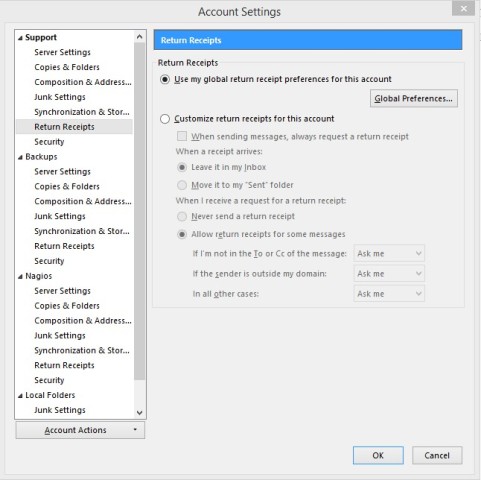
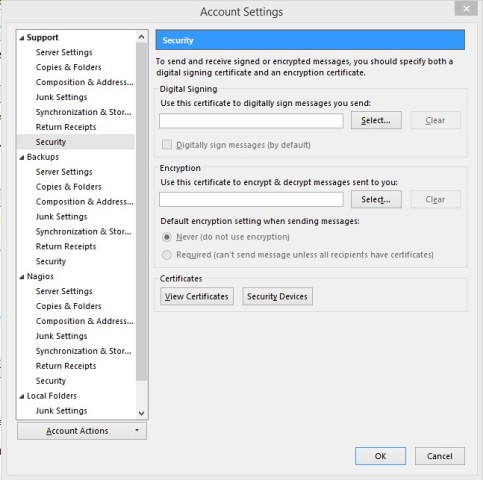
Account Settings
Verify that the account settings for all the accounts are entered as shown below.
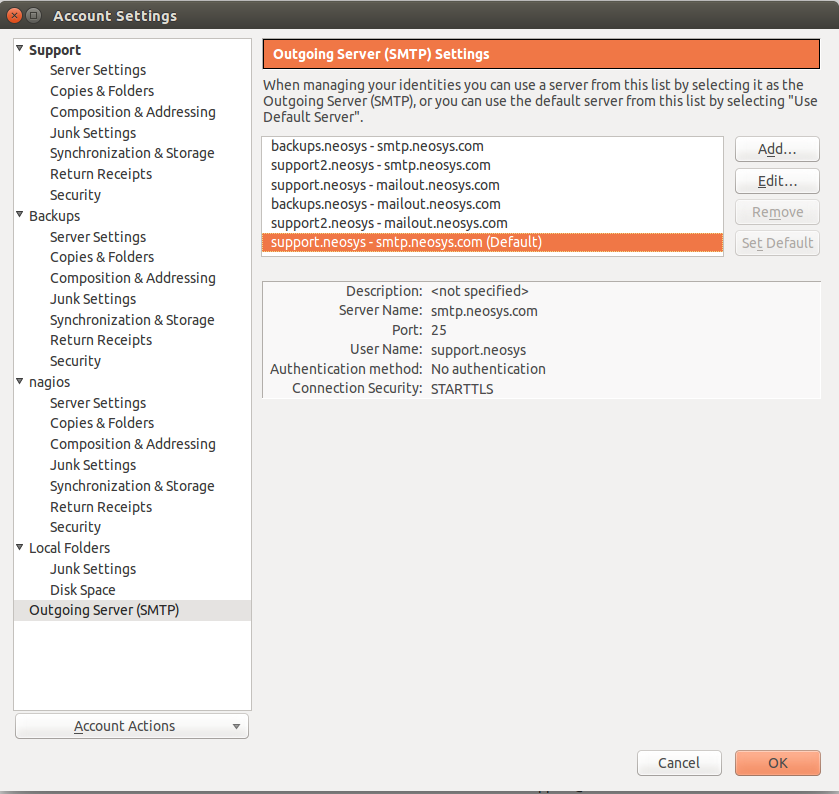
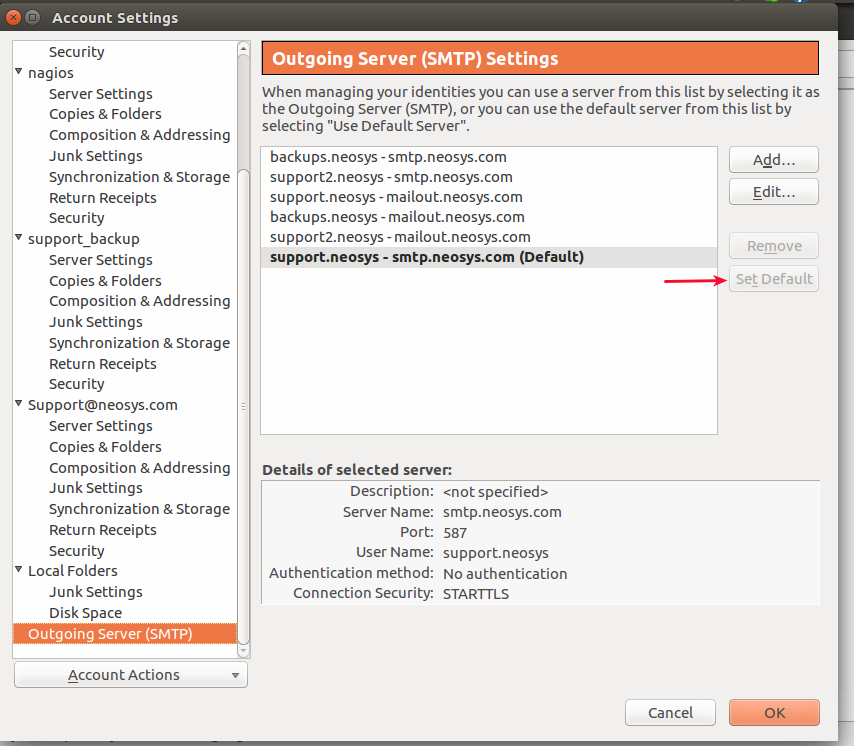
Changing the outgoing server settings
See the screenshot below to change the outgoing mail server in Thunderbird.
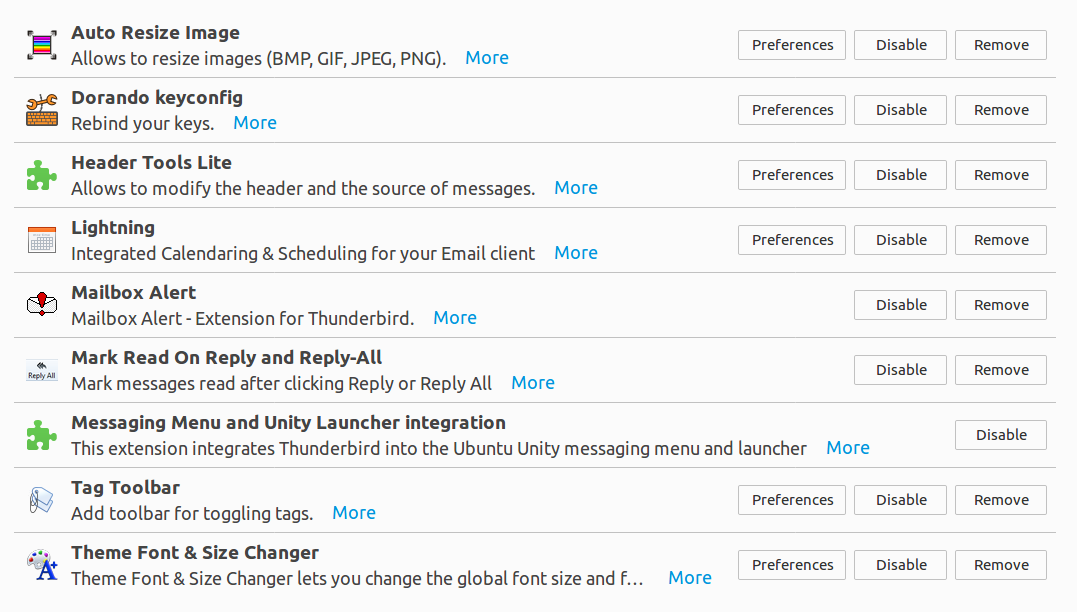
Add-ons
Setting up of Mailbox Alert: Right click Inbox, MailBox Alert and select default message, default sound and customise the default message position to preferred location and for 999 seconds instead of 5.
Other configurations
Configure Support inbox to display the "Date Received" for all emails
You MUST add DATE RECEIVED column to email inbox because the default Date seems to be the DATE SENT whereas we are primarily interested in the date we received the email. The difference is due to delays in email servers or spam tricks.
Configure Layout View
Layout view should be set as Vertical view.
